Diving into live streaming doesn't have to be complicated or expensive. A killer streaming setup for beginners really just comes down to three things: a decent camera, crisp audio, and a solid internet connection. You can build a professional-looking broadcast with just a few key items, no need to empty your wallet.
Building a high-quality stream is easier than ever. The trick isn't to chase the most expensive gear right out of the gate. Instead, focus on building a solid foundation you can upgrade later. A polished stream, even on a budget, comes from getting the basics right.
This way, your content stays the star of the show, not your equipment. A common rookie mistake is obsessing over a 4K camera when the audience would be much happier with clear, understandable audio. Think about it: a viewer might stick around with slightly grainy video, but they'll click away in a heartbeat if they can't make out what you're saying.
Before you even think about hitting 'add to cart', let's break down what truly matters for a beginner's setup. These are the non-negotiables that form the backbone of any great stream.
The real secret to a great beginner setup? Prioritize your audio. Viewers will forgive mediocre video way before they'll put up with muffled, hard-to-understand sound. Make a dedicated microphone your very first upgrade.
Streaming isn't always just about talking to a camera. Many streamers pull in other media to make their broadcasts more engaging, and this is where IPTV can be a game-changer. IPTV (Internet Protocol Television) streams TV content over the internet, unlocking thousands of live channels and on-demand shows from all over the world.
Using a Free IPTV Player right in your web browser makes it incredibly easy to stream this content without installing any extra software. This opens up a ton of possibilities—you could host watch parties, do live commentary on sporting events, or just share your favorite shows with your audience. For a steady source of channels, a service like IPTV Now is a solid option. If you want to learn more about getting started, you might want to check out our guide on how you can get IPTV for your new setup.
Your hardware is the physical foundation of your entire streaming setup for beginners, but let's get one thing straight: you absolutely do not need to spend a fortune to get started. The real goal here is to pick smart, budget-friendly pieces that will give you impressive results right out of the box.
One of the biggest myths I see is that you need a Hollywood-level camera for a professional-looking stream. The truth? Viewers are far more likely to click away because of bad audio than slightly imperfect video. That's why crisp, clear sound from a dedicated microphone should be your number one priority—it’s the secret sauce to keeping your audience hooked.
The camera you choose is pretty fundamental to how good your stream looks. Thankfully, there are some fantastic and affordable ways to get into the game without breaking the bank. Most beginners find success with popular, effective options instead of immediately jumping into expensive professional gear.
For instance, a workhorse like the Logitech C920 Webcam is a classic for a reason, delivering sharp 1080p video that gets the job done beautifully. An even more practical (and free!) route for many newcomers is to just use their smartphone as a webcam with an app like DroidCam.
Believe it or not, you can pull together a complete, high-quality beginner kit with your smartphone's camera, a solid USB mic, a clip-on ring light, and a tripod for well under $100. This makes live streaming accessible to just about anyone.
If viewers can't understand what you're saying, they won't stick around. It really is that simple. While your webcam or phone has a built-in mic, it's just not designed for the quality broadcasting demands. I can't stress this enough: investing in an external USB microphone is the single most impactful upgrade you can make.
A fantastic starting point is a condenser microphone like the Fifine Metal Condenser Recording Microphone. These mics are great because they plug directly into your computer via USB, need zero complex setup, and offer a massive leap in audio quality.
Pro Tip: Microphone placement is everything! Try to position it about 6-12 inches from your mouth and slightly off to the side. This simple trick helps avoid those harsh popping sounds (plosives) from your breath hitting the mic directly.
Taking a moment to learn how to improve sound quality is a game-changer, starting with your hardware choices and even the room you're in. Good audio can make your stream feel much more high-end. In a lot of ways, your microphone is just as important as your IPTV playlist when it comes to delivering great content. Just as you want a reliable playlist, you need reliable audio.
To make things even easier, I've put together a quick comparison table with some of my favorite budget-friendly and mid-range options. This should help you decide where to put your money for the best bang for your buck.
| Component | Budget Option (with Amazon Link) | Mid-Range Option (with Amazon Link) | Key Feature |
|---|---|---|---|
| Camera | Logitech C920 Webcam | Razer Kiyo Streaming Webcam | Crisp 1080p video quality |
| Mic | Fifine Metal Condenser Mic | Blue Yeti USB Microphone | Clear, rich audio with plug-and-play simplicity |
| Lighting | U-STREAM Ring Light | Elgato Key Light Air | Even, flattering light to eliminate shadows |
Ultimately, any of these pieces will serve you well. Don't get paralyzed by the options—pick what fits your budget and get started!
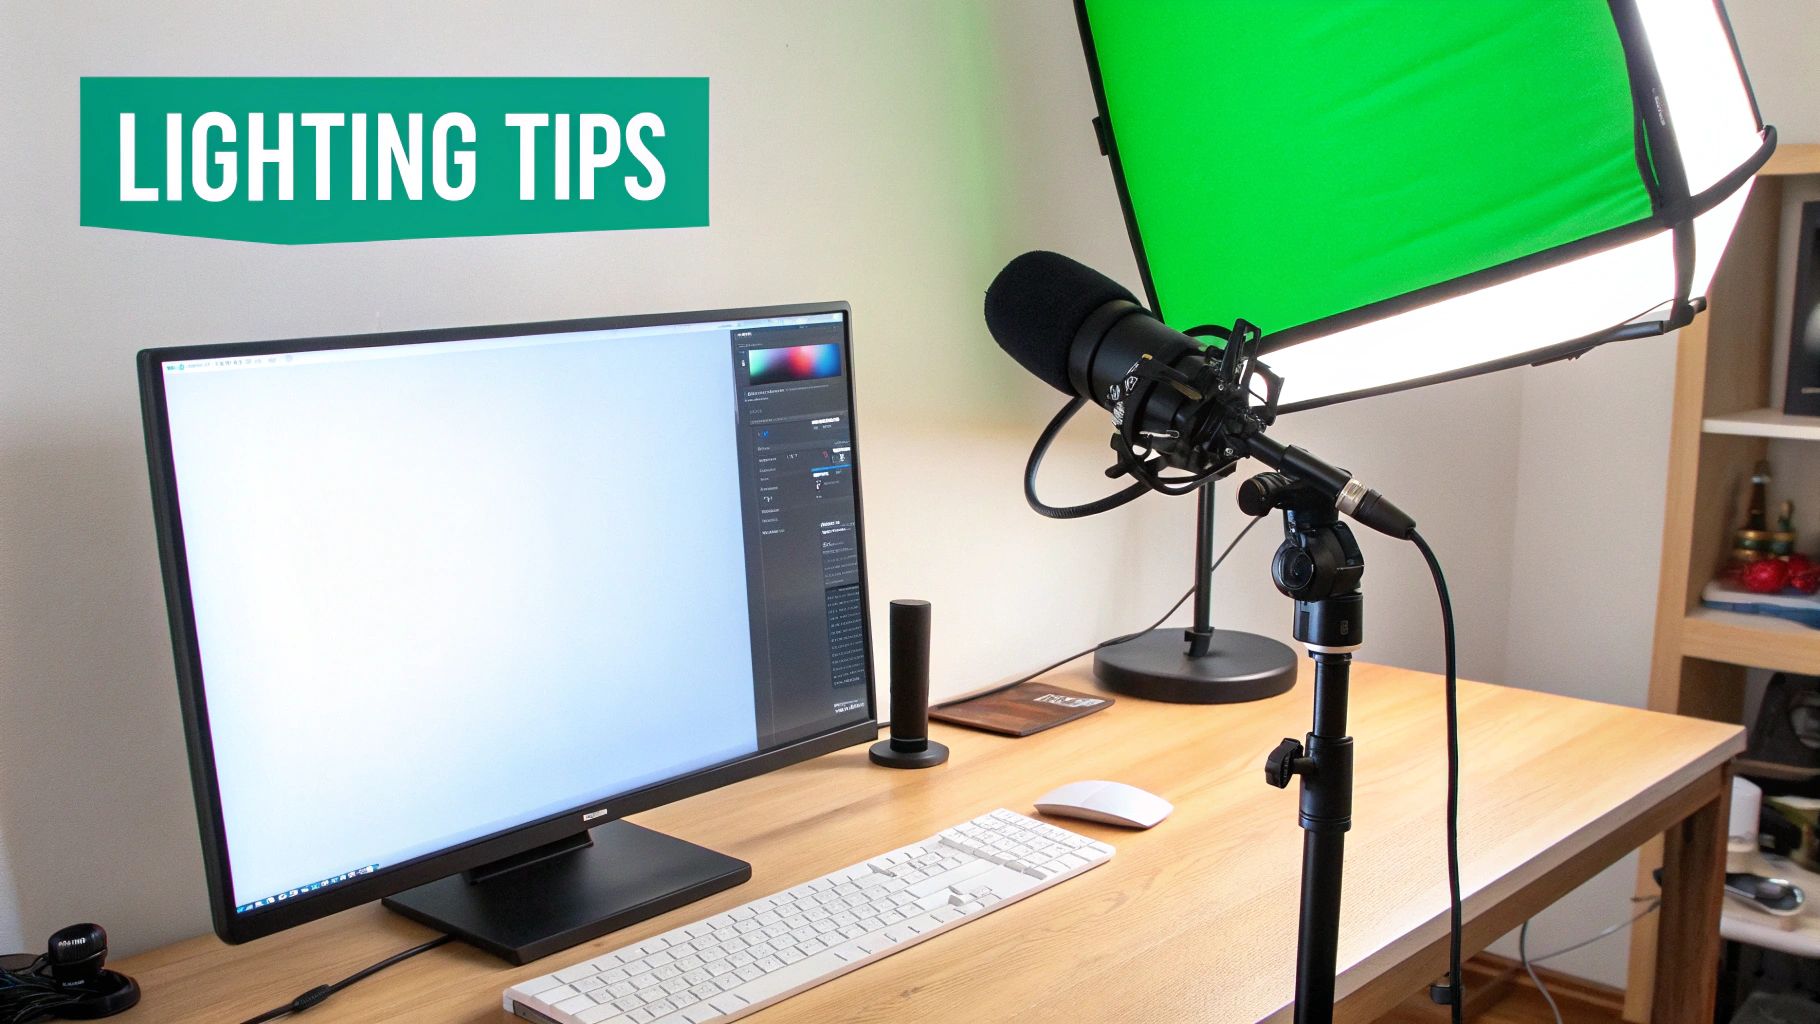
Finally, let's chat about lighting. Good lighting can make a basic webcam look incredible, while poor lighting can make an expensive camera look grainy and amateurish. You don't need a complicated, professional three-point lighting setup when you're just starting out.
A simple, affordable Ring Light is the perfect solution for most beginners. It provides soft, even light that gets rid of any harsh shadows on your face, instantly giving your stream a more polished and appealing look. Just place it behind your camera, point it at yourself, and adjust the brightness until it looks great. Easy peasy.

Alright, you've got the hardware sorted. Now for the other half of the puzzle: the software and your network. You can have the fanciest gear in the world, but without the right tools and a solid internet connection, your stream won't get very far. These are the pieces that truly bring your streaming setup for beginners to life.
If you're just starting out, diving into complex programs like OBS Studio can feel like a lot. There’s a much simpler way to get going: a browser-based streaming studio. These platforms let you broadcast directly from your web browser, which means you can skip the tricky installations and avoid bogging down your computer.
The beauty of browser-based tools is how they lower the barrier to entry. You don't need to be a tech wizard to get started. Generally, all it takes is signing up for a free account, giving your browser permission to use your camera and mic, linking your Twitch or YouTube account, and hitting that "Go Live" button. It's a game-changer for newcomers.
Many of these platforms also support multistreaming. This is a killer feature that lets you broadcast to several places at once—think YouTube, Facebook, and Twitch, all at the same time. It's a massive shortcut to reaching a much wider audience without any extra work on your part.
And it works both ways. You can also pull content into your stream just as easily. With our Free IPTV Player, for example, you can stream live TV and on-demand content right in your browser. Just grab an M3U playlist and paste it in. Suddenly, you have a whole world of content ready to go, no downloads needed.
Your internet connection is the invisible backbone of your entire broadcast. A shaky connection will lead to lag, buffering, or even a complete drop-off, which is the fastest way to lose viewers. The number one thing you need to care about here is your upload speed.
While download speed is all about how fast you can pull content from the internet, your upload speed determines how smoothly you can push your stream out to your audience. A higher upload speed equals a more stable, higher-quality broadcast.
So, what kind of speed should you be aiming for? Here are some good starting points:
Think of these as the bare minimums; having a little extra headroom is always a smart move. If you're wondering what plan is right for you, we break it all down in our guide on what internet speed for streaming you need.
One final tip, and it’s a big one: always use a wired Ethernet connection instead of Wi-Fi if you can. A physical cable gives you a far more reliable and consistent signal. It cuts down on the interference and dropouts that plague wireless networks. It’s a simple switch that makes a world of difference for your stream’s quality.
Once your hardware and software are humming along, it's time to bring more dynamic content into your broadcast. This is where Internet Protocol Television (IPTV) becomes an absolute game-changer in your streaming setup for beginners. It lets you tap into thousands of live TV channels and on-demand content right over the internet, which you can then share live with your audience.
The most straightforward way to jump in is with a browser-based solution like our Free IPTV Player. It completely sidesteps the need for extra software cluttering up your computer. All you need is an M3U playlist—which is just a simple text file with links to media streams—and you paste its URL into the player. In seconds, a massive library of content is at your fingertips.
The quality of your IPTV experience really boils down to the M3U playlist you use. You can find free playlists online, but I've found they're often a roll of the dice. Channels can buffer endlessly or just stop working without warning, which is the last thing you want mid-stream.
For a stable, high-quality broadcast, I always recommend investing in a premium service. It's worth every penny for the reliability. A provider like IPTV Now offers dependable playlists that ensure a smooth viewing experience for both you and your viewers.
Got your M3U URL? The rest is a piece of cake:
This simple process is a lifesaver, especially if you're looking to host watch parties or provide live commentary on sports and events. If this is all new to you, don't worry. We've got a great primer on what IPTV is and how it works that breaks it all down.
While our player works like a charm in any modern web browser on a PC or Mac, you can also bring your IPTV setup to dedicated streaming devices. This gives you a more traditional, kick-back-on-the-couch TV experience when you're not live.
Plenty of popular devices are ready to go. For instance, an Amazon Fire TV Stick is an affordable and surprisingly powerful choice. You can just use its built-in web browser to pull up the Free IPTV Player. Android TV boxes also offer fantastic flexibility for running all sorts of IPTV applications.
This visual below really simplifies the core ideas behind getting your stream's audio just right—a critical step for any broadcast.
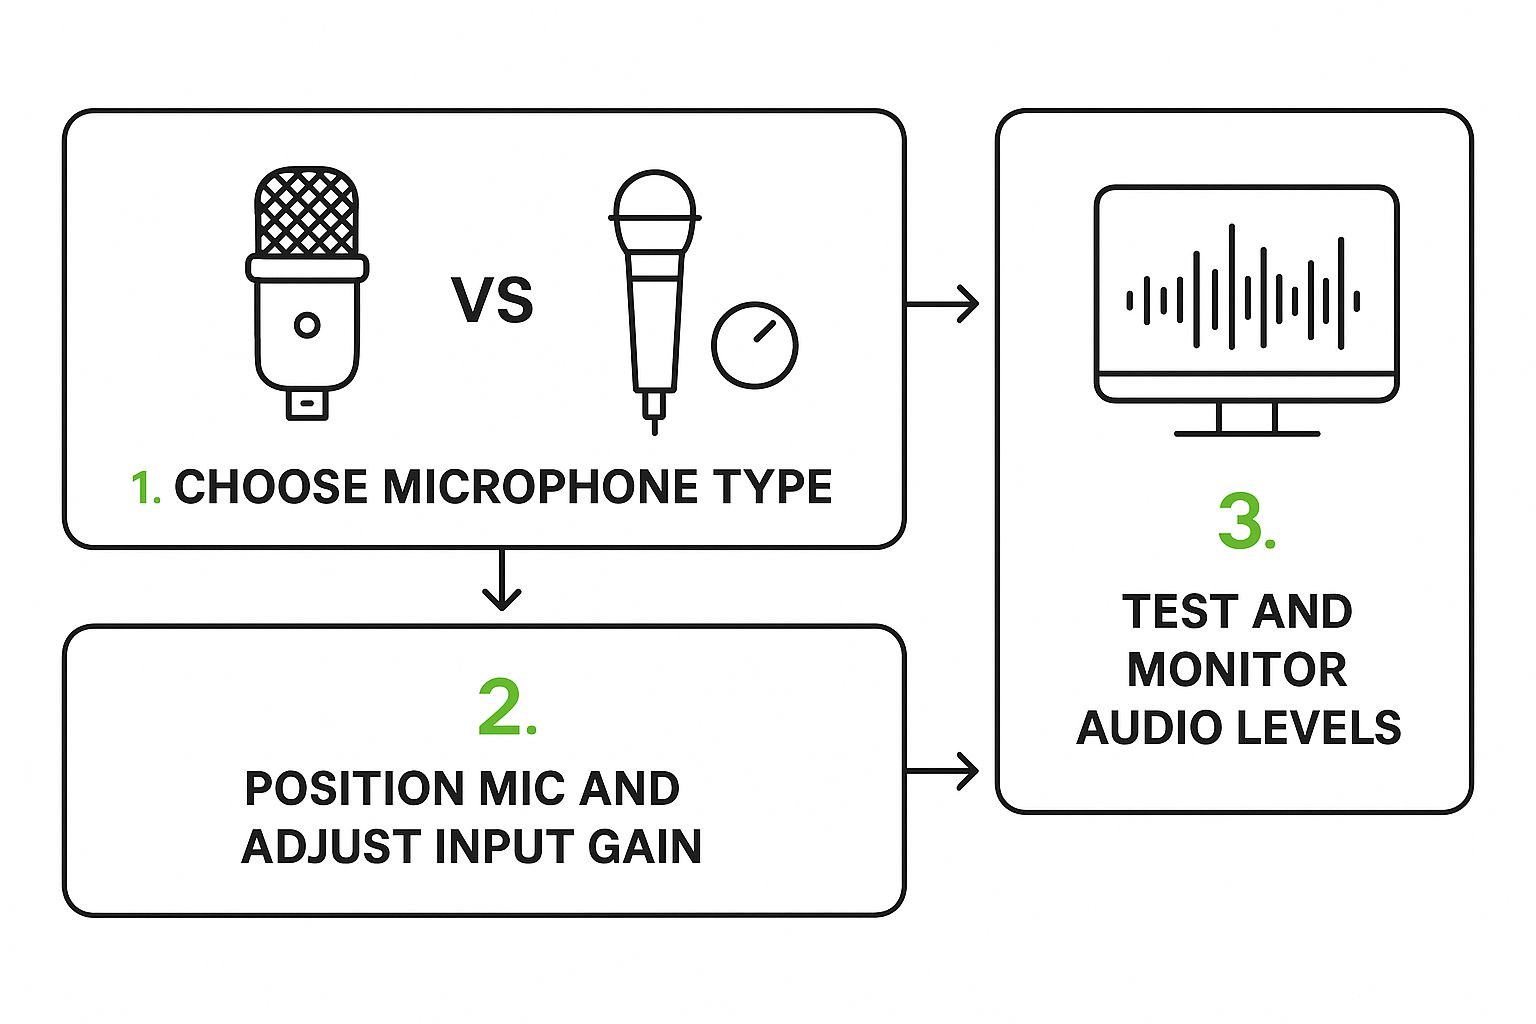
It helps reinforce that a great setup follows a logical path, from picking the right gear at the start to monitoring your quality at the end.
To make this even easier, here's a quick checklist you can follow to get everything set up without a hitch.
This table breaks down the entire process into simple, actionable steps. Follow it, and you'll be streaming in no time.
| Step | Action | Pro Tip |
|---|---|---|
| 1. Choose Your Playlist | Select a reliable M3U playlist. | For streaming, a premium playlist from a provider like IPTV Now is highly recommended to avoid buffering and broken links. |
| 2. Get Your M3U URL | Copy the M3U playlist URL provided by your IPTV service. | Keep this URL saved somewhere safe and accessible, like in a password manager or a secure notes app. |
| 3. Open the IPTV Player | Navigate to the Free IPTV Player website in your browser. | Bookmark the player's URL for quick access in the future. It saves a lot of time! |
| 4. Load Your Playlist | Paste the M3U URL into the designated field on the player. | Give the player a few moments to load all the channels. Larger playlists might take a bit longer to populate. |
| 5. Start Watching | Browse the channel list and click on any channel to start streaming. | Create a list of your favorite channels so you can find them quickly during your next session. |
This checklist simplifies what can seem like a complicated process. Once you do it a couple of times, it becomes second nature.
A great streaming setup for beginners is a fantastic start, but it's only half the battle. Building a genuine community is what gives your channel life and keeps people coming back. Your most powerful tool for growth isn't a piece of gear—it's interaction.
Engaging with your live chat is absolutely non-negotiable.
When someone takes a moment to type a message, calling them out by name makes them feel seen. That simple act turns a passive viewer into an active part of your stream. It's the first step in building a loyal community that tunes in every time you go live.
Think of your streaming schedule like a prime-time TV slot. A consistent schedule builds anticipation and makes it second nature for viewers to weave your stream into their daily or weekly routine.
Whether you go live every Monday, Wednesday, and Friday night or just on weekends, the key is to stick to it. This reliability builds trust and shows your audience you’re serious. Just posting a simple schedule on your channel page can make a massive difference.
Your investment in clear audio and video directly impacts viewer retention and interaction. If your audience can't see or hear you clearly, they're less likely to stick around, let alone participate in the chat. Quality production signals that you care about their experience.
Where you stream really matters. Platforms like Twitch and YouTube have different tools and attract different crowds. The potential is huge, especially on a platform like Twitch, which is home to around 7.7 million active streamers worldwide.
In 2022 alone, its audience watched an incredible 1.35 trillion minutes of content. That number alone shows why even a basic setup is worth the effort to tap into this massive audience.
To really stand out, learning how to create viral content that connects with people is a skill every streamer should work on.
Here are a few quick tips for turning those viewers into followers:
Diving into the world of streaming for the first time is exciting, but it almost always comes with a bunch of questions. Getting straight, practical answers is the best way to build confidence and skip over the common hurdles that trip people up.
Let's tackle some of the most common questions we hear from people just like you who are getting their first streaming setup for beginners off the ground.
One of the biggest initial concerns is always money. A lot of newcomers think they need to drop a small fortune to get a professional-looking stream, but that's just not the case anymore.
You can actually pull together a fantastic beginner setup for between $100 to $200. The trick is spending that money where it counts. We're talking about high-impact essentials like a solid USB microphone, a reliable 1080p webcam like the classic Logitech C920, and a basic ring light. Pair that with free software, and you're in business.
Ask any seasoned streamer, and they'll almost all give you the same answer: audio. While crisp video is great, nothing makes a viewer click away faster than bad sound. People will tolerate a grainy webcam, but they won't stick around for muffled, distorted, or hard-to-hear audio.
If you're going to invest in one thing first, make it a decent entry-level USB microphone. It's the biggest upgrade you can make to the viewer experience and instantly makes your whole stream feel more professional.
Another big question is about computer power. Do you really need a beast of a gaming PC to get started? Not at all. That's only a requirement if you're planning on streaming graphically intense, high-end video games.
For many other types of content—like talk shows, art streams, tutorials, or even streaming IPTV channels—a modern laptop or desktop computer is perfectly fine. Plus, if you use browser-based streaming tools, you take a lot of the processing load off your own machine, making it even easier to get started.
Okay, let's get down to the fun part: adding content to your stream. Integrating IPTV is way simpler than it sounds and gives you a massive library of things to watch and react to.
First, you'll need a subscription from an IPTV provider, such as IPTV Now. They will provide you with a special link called an M3U playlist URL.
Next, you just open a compatible player—like our Free IPTV Player—on your computer or even a Fire Stick. The app will have a spot where you can paste that M3U link. Once you do, it loads up all the channels, and you're ready to stream live TV and on-demand movies in seconds.
Ready to start streaming content without any downloads? Try the Free IPTV Player and access your M3U playlists directly in your web browser. Get started in seconds at https://freeiptvplayer.net.